Beer Geek

My son has been trying to convert me into a beer geek. Because of his interest in and love for craft-brewed beers, I’ve gotten into trying new beers at every opportunity. Since our part of New Jersey is almost a craft beer wasteland, most of those opportunities come when we travel, so that helps to keep me from going overboard. But I have begun to appreciate beer more than I used to, and I recently got interested in creating a poster, or possibly  a T-shirt, to celebrate this new interest.

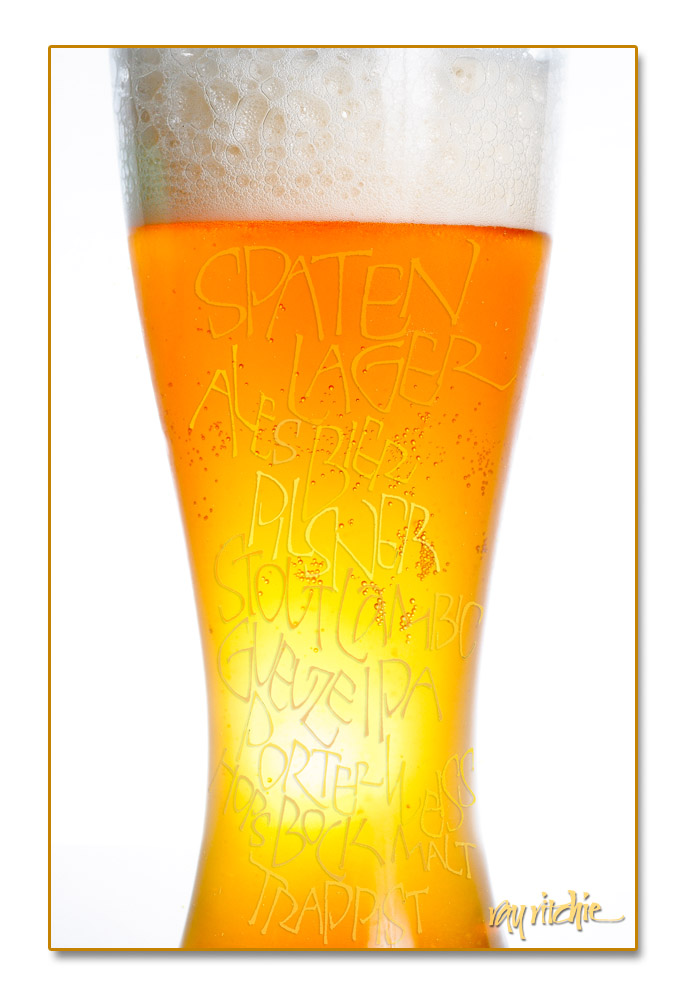
Here’s the first draft:

I really need to do the photo and the lettering over again a little more carefully. I originally laid the lettering out in a roughly rectangular format, so when I “poured” it into the glass, in Photoshop, I had to use the Warp command to make it fit the glass. If I re-do it, I’ll do the lettering in a closer fit to the shape of the glass from the beginning.

The lettering was done in pencil, scanned into Photoshop, and then colored by sampling colors from the beer photo and using the Paint Bucket tool to pour the colors selectively into the different words and letters. The setup for the photo was a large sheet of styrofoam for the background, with one flash to light the background to almost pure white, and a second flash on a shoot-through umbrella stand to illuminate the glass of beer.

Footnote: The Beer Geek poster is available as a  12×18-inch art-quality print on watercolor stock or semigloss photo paper, for $40 plus shipping and handling. S/H to US domestic addresses usually run around $8.

Graphic botanicals

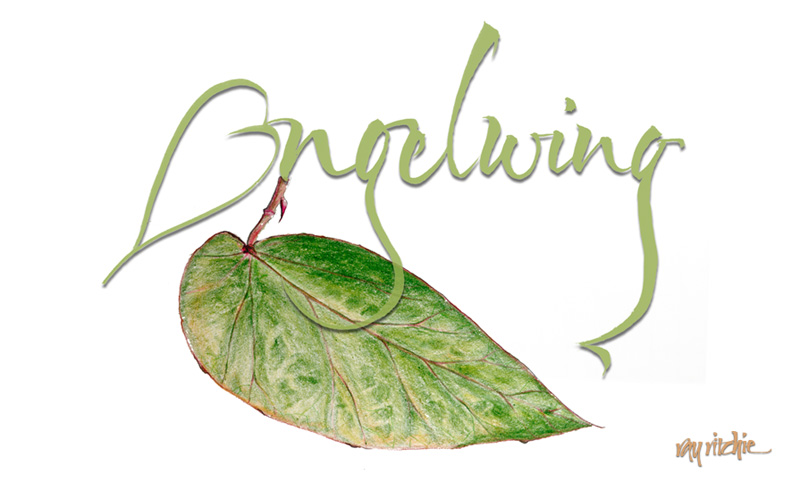
One of the plants we brought home to New Jersey from my mother’s collection was an heirloom Angelwing Begonia. Mom got her plant as a cutting from one of her mother’s plants, and there seems to be some family lore that suggests Grandma got it from her mother. I think the Angelwing Begonia was first hybridized around 1926, so that could be about right to support the oral tradition. Mom had propagated numerous cuttings of her original plant, and after she died, my brother was trying to make sure everyone knew where they came from, and to send a plant home with each member of the family. Recently I was using this plant as a model for my continuing study of botanical art, sketching with colored pencils. After I sketched the plant, I was playing around with the word “Angelwing” with my brush, and decided I’d like to combine the sketch with the lettering. Here’s the current layout:

If you have thoughts about other ways to combine these two elements, I’d welcome your comments!

Hostas

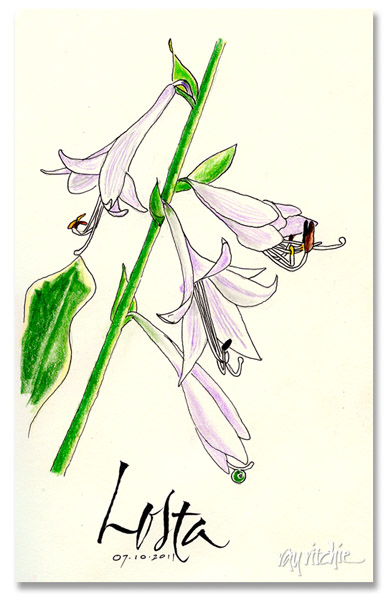
Following up on the photo in the previous post, I was playing around today with sketching hosta blooms in my sketchbook. Here’s my sketch, in pencil, ink, and colored pencil (title lettering done with the Pentel brush pen):

I have a ways to go before considering myself a botanical artist. This kind of sketching is a challenge for me, because it requires that you see things in such detail. You start to draw a leaf, thinking of it only as a green oval shape, and then you see that, no, the tip is turned up, and you’re seeing two surfaces at once on the same leaf. You start sketching the petals of the bloom, and you realize that they overlap each other in a very particular order. And when you’re sketching from a photo, as I was doing here, you have to mentally translate from a two-dimensional view of the plant to a three-dimensional model in your mind, and then pick which lines and contours you will draw in order to turn in back into a two-dimensional sketch.

A Cyberscribes (see link at right) acquaintance, Bonnie Noehr, recently posted that she was taking summer courses on botanical drawing. I thought this was intriguing, so I asked her for further information. She’s taking her class in Woodside, California (a little far for someone living in New Jersey), but she sent me this link listing classes in a variety of locations. With our first grandchild due any day now, I’m not sure I’ll get around to the classes this year, but it’s one more idea for the “someday” list.

Bonnie, by the way, is a past winner in the Graceful Envelope contest. You can see her winning envelope here.

Folded calligraphy

A few days ago, in browsing the Roku for something interesting to watch, we happened across the documentary Between the Folds, by Vanessa Gould. This is a short film about the art and science of paper folding. I have played a little with origami in the past, but the level of skill and the intricacy of the patterns shown in this movie was so far beyond anything I had seen before that I felt an irresistible urge to pick up a sheet of paper and start folding.

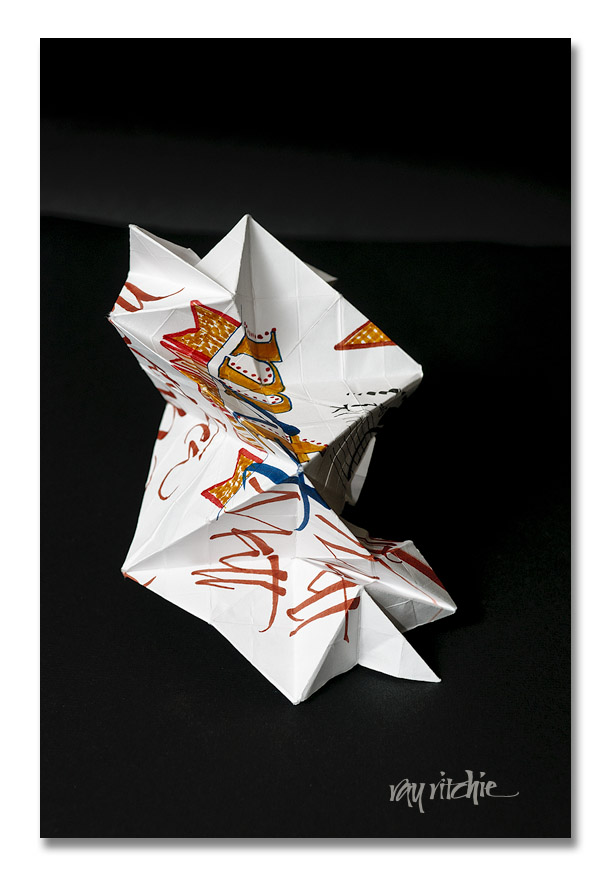
As it happened, the closest sheet of paper to me was a piece of scrap paper on which I had been sketching ideas for a envelope design for my nephew Matt’s upcoming birthday (Happy Birthday, Matt!). I just started by making semi-random folds, not trying to create anything in particular, but folding the sheet into a fan pattern in one direction, then un-folding it and doing the same with the sheet turned 90 degrees, and finally, I started throwing in various folds that I remembered from simple origami patterns I had learned years ago. My main thought was just to create something with enough complexity of facets and textures that it might enhance or add interest to the calligraphy. Here’s a photo that suggests what can emerge from this process:

This was just a preliminary experiment, but the result intrigues me, and motivates me to want to learn more about the current state of the art in paper-folding. If any reader has had experience in combining calligraphy and folding, I’d be particularly interested in hearing from you!

Happy 90th, Bill!

My father-in-law will be 90 on April 16th, and the family is throwing a party to celebrate, so I volunteered for the job of designing the invitations. Now that I’ve shipped the design to the printer, I thought I should post it here.

Bill was a C-47 pilot in World War II, and after the war he went to work for the U. S. Postal Service, eventually becoming an assistant postmaster. Since he has always loved stamps, I decided to “issue” a commemorative stamp and First Day Cover for his birthday. Here’s the front side of the invitation:
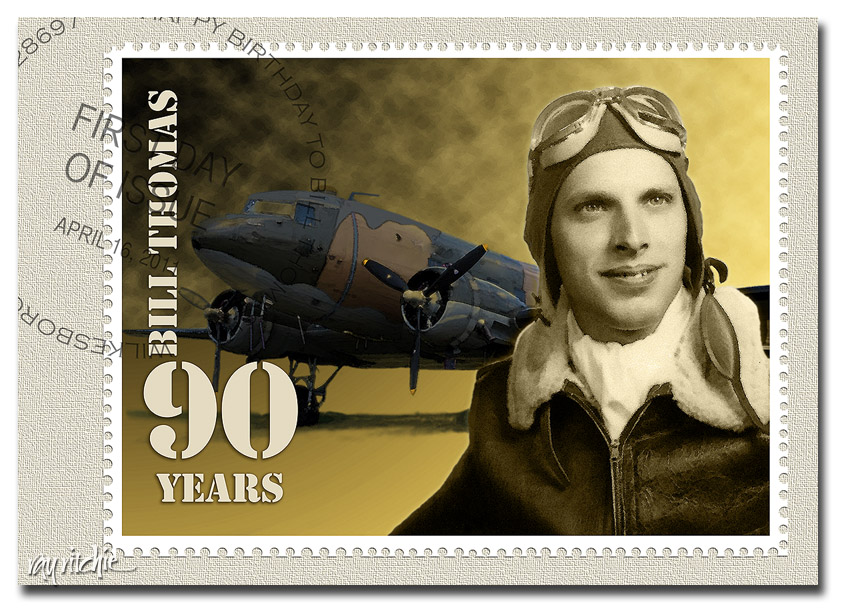
The photography here is not mine, and unfortunately, I don’t know who did the originals. The portrait was apparently done by an Army photographer when Bill graduated from his pilot training and received his lieutenant’s commission. In addition to the usual problems of restoring an old photo (cracks, scratches, a tear, and a lot of “foxing,” or spots of discoloration), this one had an additional oddity: there was some sort of metal brace behind his head, apparently holding him in a fixed position for the shot. I assume this may have been a production line kind of thing, perhaps for identity cards: each new lieutenant steps up, puts his head in the brace so that he’s exactly lined up for the camera, and the photographer snaps the shot – no retakes, no fiddling with multiple poses. What this meant to me was lots of Photoshop work with the Spot Healing Brush to take out the blemishes,  extract his photo from the background, and remove the offending metal brace with the eraser tool. The original photo was black & white, but I changed the coloring to more of a sepia tone, as I wanted to use a color scheme of yellow, brown, and olive to suggest the era. The original photo was just a head and shoulders shot, so I recreated his right arm for the stamp, to give a more natural look when the portrait was placed against the background.

The C-47 photo started as one of dozens of similar shots that I found on various websites discussing the history of aviation and WWII. None of them were large enough for my purposes, though – I needed to make a 4×6 invitation at 300 dpi, and I also wanted to create a large poster to be used as a decoration at the party. When I enlarged the largest photo I could find to the size I needed, it became very pixelated, blocky, and generally ugly. So I just used the original photo as a base pattern for color and general shape, and the painted in the details in Photoshop using my graphics tablet. I suspect that Bill’s original plane was solid khaki in color, but I saw lots of different color schemes in all the shots on the web, so since I was having to create a painting anyway, I used my artistic license and changed the color scheme to something that fit in with my selected color palette. I didn’t paint in the plane’s identity markings, since I didn’t know what markings would have been appropriate to his squadron, and I didn’t really want too much detail in the background, anyway.

The sky was created using the gradient tool, followed by Filter>Render>Clouds to create the storm clouds behind the nose of the plane. Finally, since I wanted the artwork to look like postage stamp art, and not a photograph, I used the Watercolor filter to create more of a painting effect. There’s a subtle touch of “Outer Glow” behind the portrait, just to give it a bit of separation from the background.

The finishing touches included the stencil font to suggest a typical utilitarian Army approach to lettering, and I tried to select fonts which resembled typical postmarks for the First Day cancelation. The perforations around the stamp were done by selecting portions of the border with the circle selection tool, then deleting the selection. Actually, many commemorative stamps today don’t even have perforations, as they’re usually adhesive stamps on a waxed backing material – but I like the look and texture of perforations, so I decided Bill’s stamp would have them. Finally, I placed the stamp on a cream-colored “envelope” background, and gave it a woven texture.

One nice benefit of transforming the photos into digital paintings was that the design enlarges really well. The original details have been somewhat obscured by the painting effect, so when I enlarge the image with Photoshop’s Image Size menu, it’s almost impossible to tell what details were in the original painting, and which have been interpolated. The fonts were left in separate text layers, and they enlarge perfectly as crisp, sharply defined letters, which actually seems to enhance the postage stamp look. It looks good on my 16×24 print, and I’ve tried a “virtual print” on the computer screen at 24×36, which still seems to hold up well.

Happy Birthday, Bill – we’re looking forward to the party!

About that molding

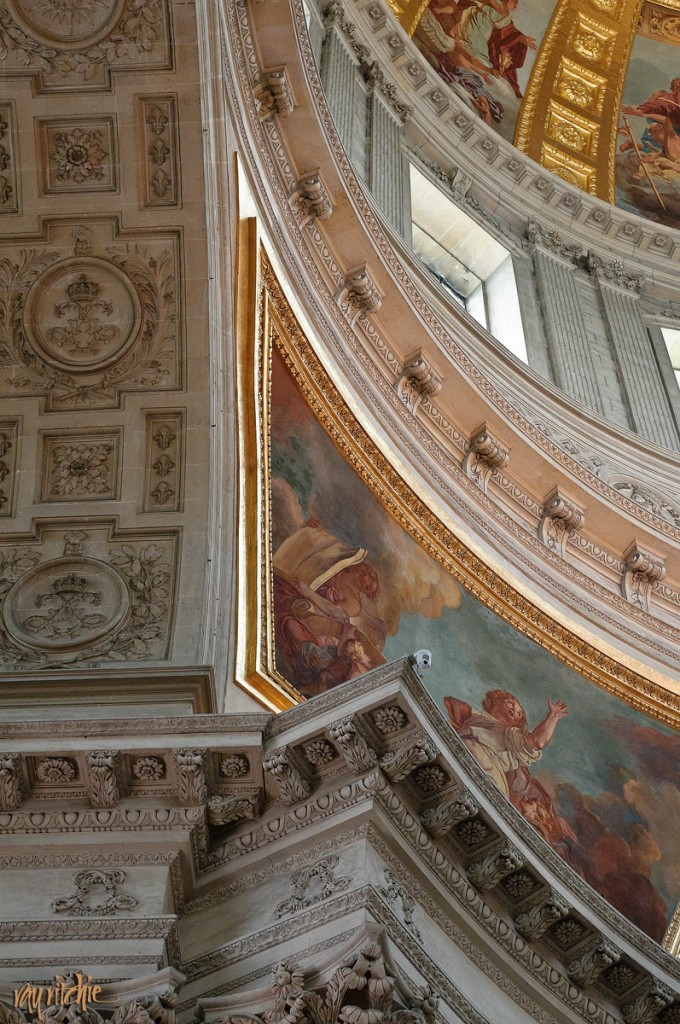
I mentioned in the previous post that I started my sketch with a drawing of a molding from Les Invalides, in Paris. For the curious, here’s a photo:

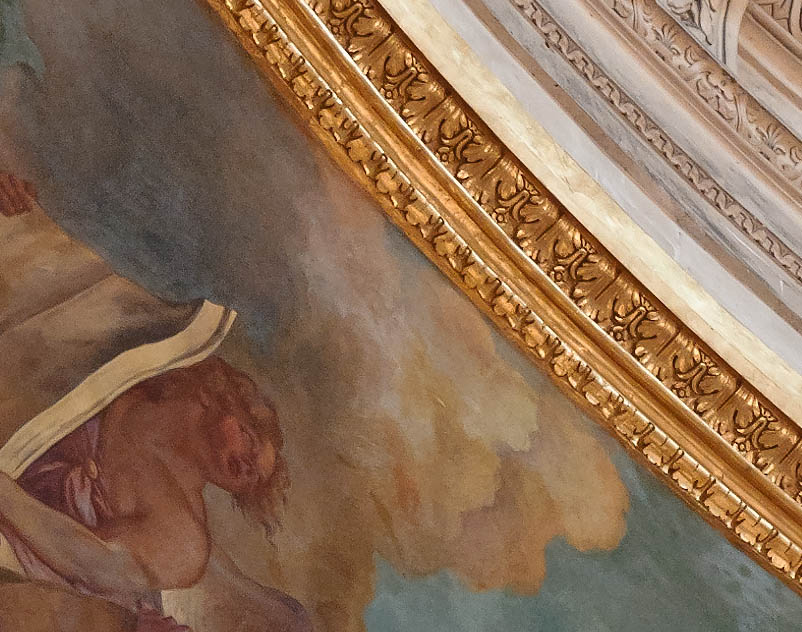
And here’s a crop, showing the molding in more detail:

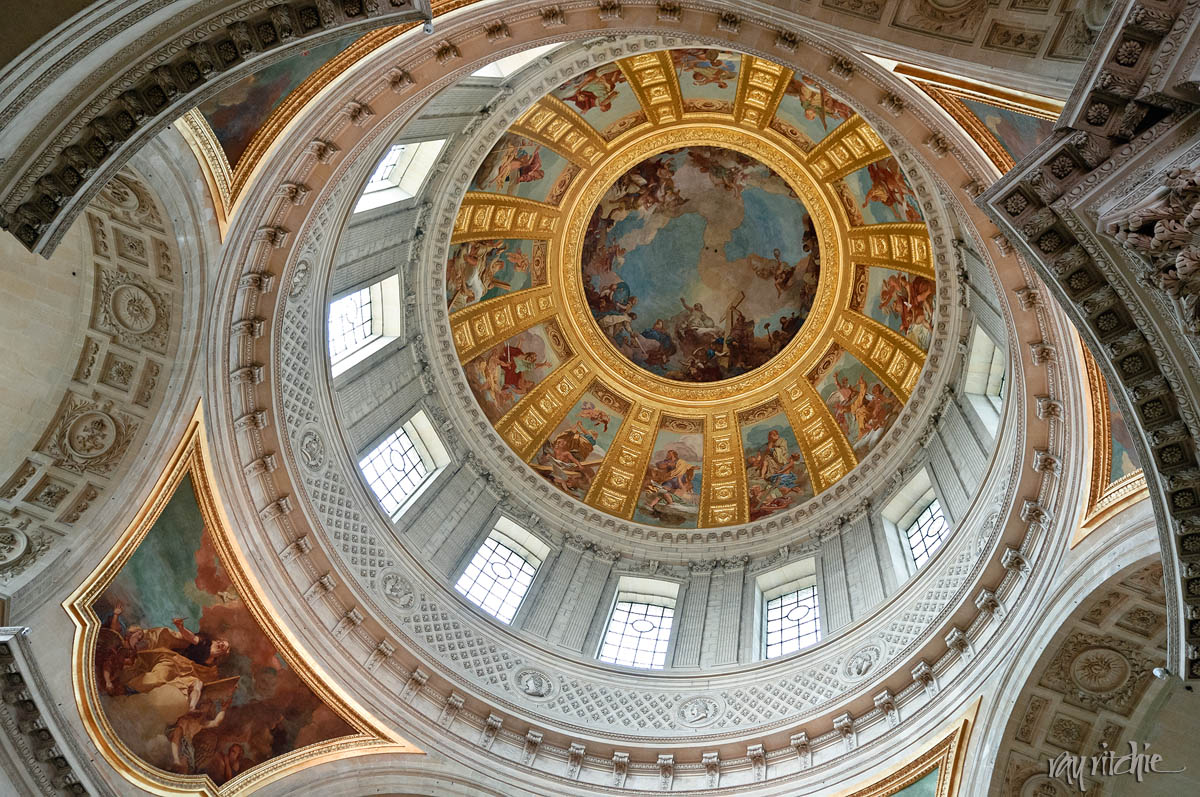
This is all part of the amazing detail of the dome of the Église du Dôme, which is directly over Napoleon’s tomb. Looking up to the center of the dome, you see this view (click on the image, and then click on the “full size” link, and you’ll be led to a much larger view):

The interior of the chapel dome in Les Invalides

I’m not sure why that particular molding caught my eye – I think I was just impressed that there was so much detail in a decorative element that was so high up, where most viewers would never even notice it. It says something to me about the dedication and love for his craft that the framer must have had.

Cards and envelopes

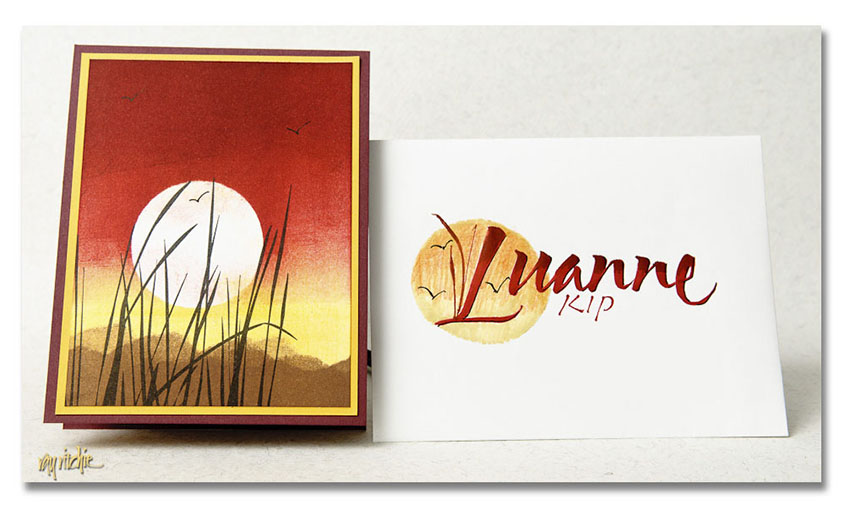
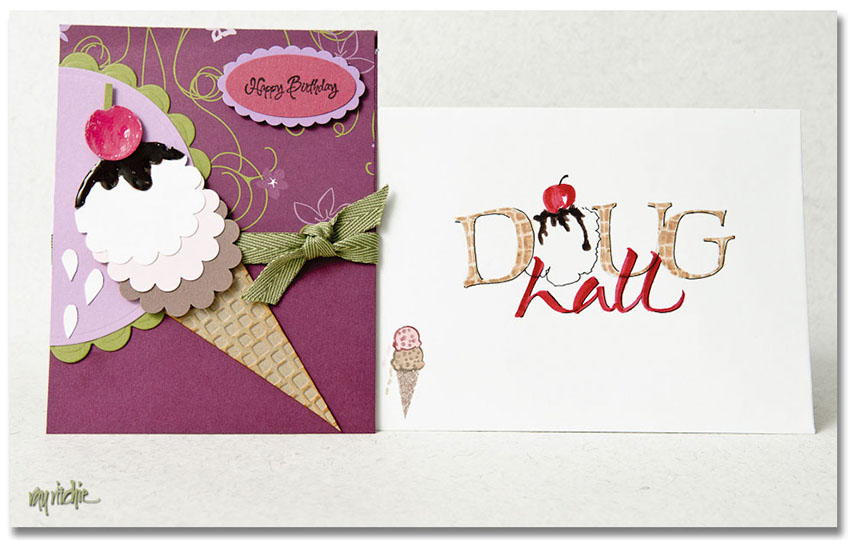
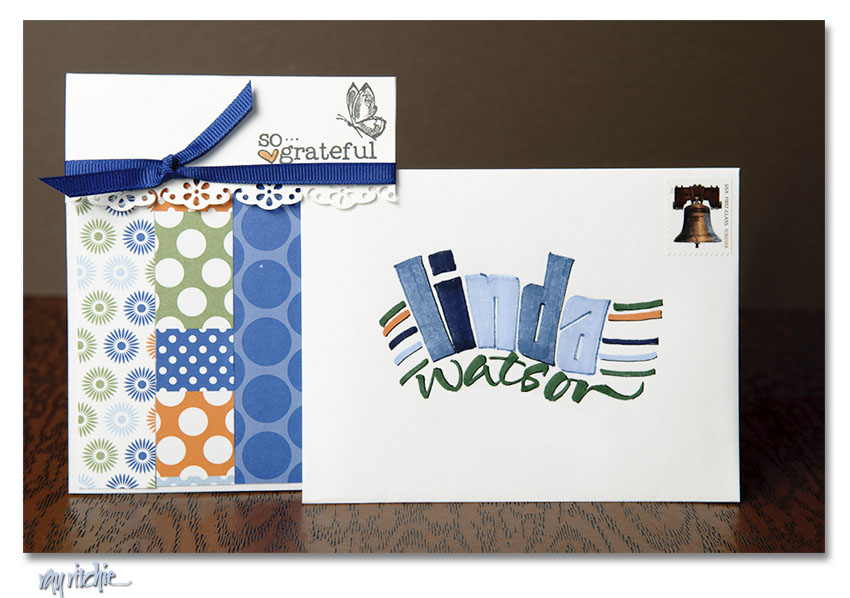
Anita is a dedicated card maker. She must make several hundred cards each year, most of them sent to friends and relatives, but occasionally made for sale or for support of some particular organization she’s involved in. Each of these cards is a fairly elaborate construction, perhaps involving rubber stamping, punched or die-cut elements, embossing, layering of papers and textures, and hand coloring and brayering, just to mention a few of the techniques she sometimes uses. After the card is ready, it usually comes to me for design of a matching or complementary envelope.

These envelopes are good opportunities for me to play with styles and colors and experiment with designs I might not do for my own projects. The envelopes, in contrast to Anita’s carefully worked out designs, are usually only about one step above a doodle. I typically grab a felt-tip brush marker (we have a set of colors that match most of her card stock colors and stamping inks), make some quick sketches on a piece of scrap paper, and then do the envelope. I may use colored pencils, ballpoint pens, and Rapidograph, Pigma, or Uniball pens for some final details and highlighting – whatever is handy at the time. Brush scripts are usually written directly with the marker, and other letter styles are usually drawn with a pencil and then painted in; I rarely go upstairs to my drawing board for my calligraphy pens, gouache, brushes, etc. for casual envelopes like these. Unless I make a major mistake, whatever comes out of the first attempt is what goes in the mail. But it’s fun, and I often like the overall effect. Here are a few recent examples of these collaborations:

Anita asks that I note that the first card above is based on a design by Tami White, the second is based on one by LeeAnn Greff, and the third inspired by a card by Becky Roberts.

Postcards from Asbury Park (part 2)

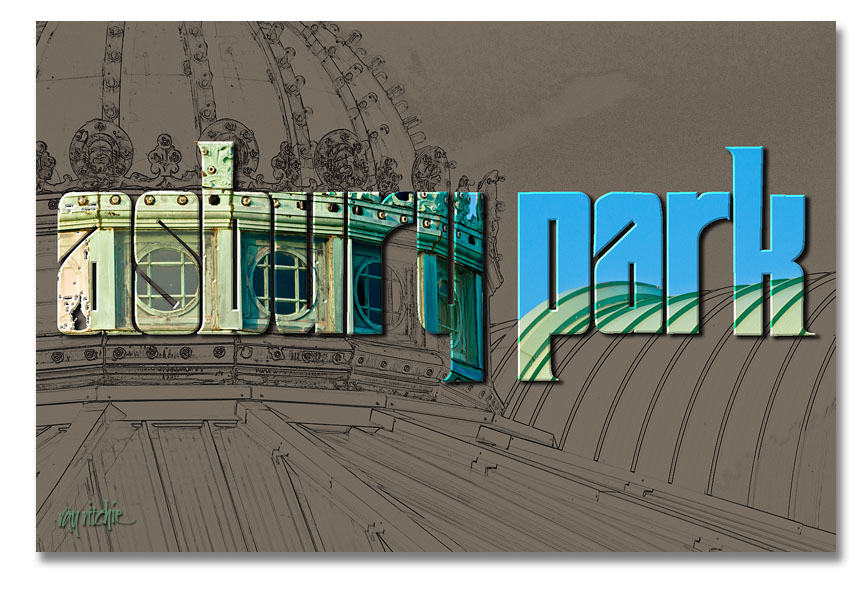
I’ll wrap up my discussion of the Sickel lettering design for Asbury Park with a couple of additional examples that show how the broad strokes of this lettering style give us an advantage for photographic effects.

The Old Casino

Here I’ve taken one of my photos of the roofline of the old Casino complex and turned it into a line drawing using the Photoshop “Find Edges” filter. I then used the same lettering as in the first postcard (see Postcards from Asbury Park – part 1) as a mask to let some of the color from the original color photo come through.

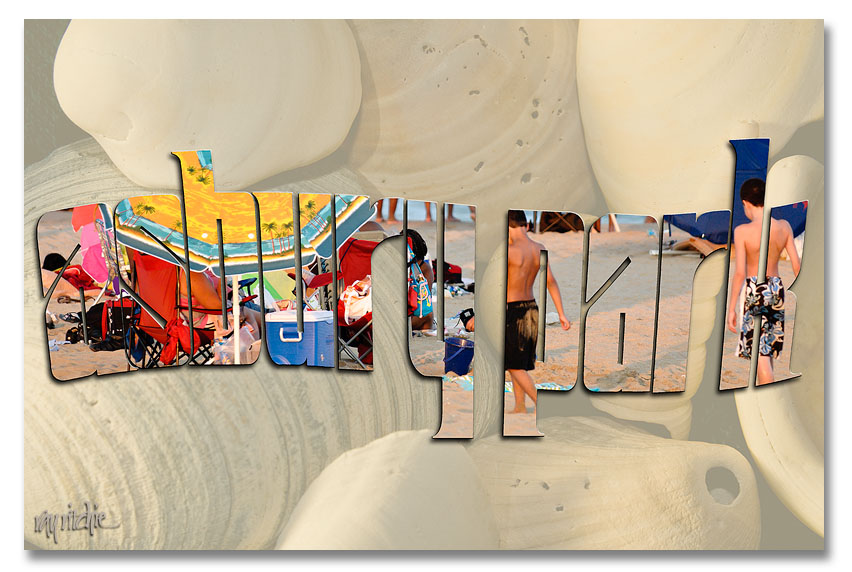
This one, obviously, is two separate photos. The background shell image is from my personal stock library, and the second was a beach scene made during the July 24 Photo Walk. I used a wavy version of the Asbury Park lettering to mask that second photo and layered it over a faded version of the shells.

I could as easily have used a font, rather than designing my own letters for these cards, of course. A font like Arial Black would also give me nice heavy strokes, but it wouldn’t be as distinctive – someone else could easily produce the same look. The combination of my own lettering with my photos gives the cards a unique look that hopefully would distinguish them from others on the rack.

I’ll have to decide now whether to actually do a commercial print run of any of these – it’s probably too late in the summer vacation season to do it for this year – if you have a favorite, please use the comment button or the contact form to let me know.

More on lettering and calligraphy

To take the exploration of lettering and calligraphy a little further, here are a few examples I’ve been playing with today.

A few weeks ago, I participated in Scott Kelby’s Third Annual Worldwide Photo Walk, an event in which groups of 50 or fewer photographers get together at sites all around the world and take photos for a couple of hours. My local walk was held in Asbury Park, New Jersey (the town where Bruce Springsteen and Jon Bonjovi first made names for themselves as rock musicians). A few of my photos can be seen in my photostream here. Since that time, I’ve been thinking of making some kind of poster, T-shirt, or other graphic with one or more of the photos – but I need some lettering that says “Asbury Park.”

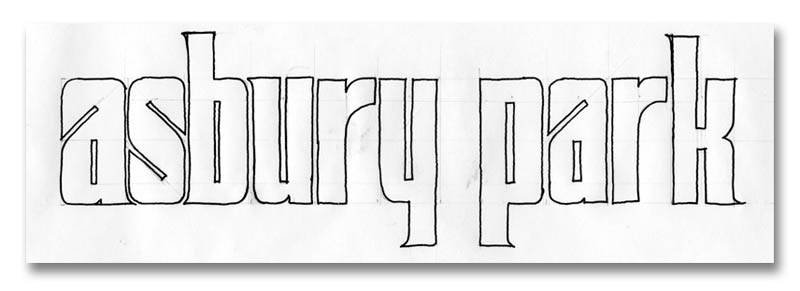
Here’s a sketch for a possible base design, just as it came off my drawing board:

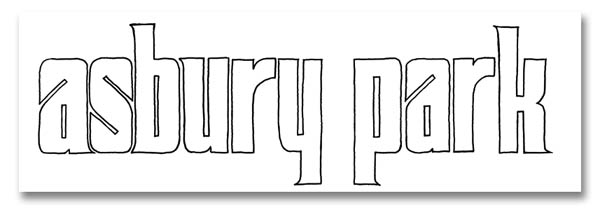
This is a variation of a style of lettering known as “Sickel,” which has been recently discussed on cyberscribes. Note the pencil lines – the design is drawn based on geometric proportions, and then quickly inked in with a pen. After a little cleanup in photoshop, it comes out looking like this:

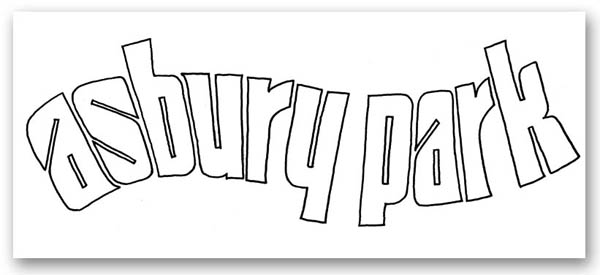
And if I want to clean it up further and make it easier to enlarge and distort the letters, I can import that drawing into Adobe Illustrator, and trace it with “bezier curves,” which will get rid of all the little bumps and rough spots in my hand drawing. I like this style of letters for this particular application, because 1) it has a “retro” feel that harkens back to the glory days of Asbury Park in the early 20th century, 2) the wide strokes give me lots of room for graphic effects, including using the letters as a mask that my photos will show through, and 3) it lends itself to manipulation and distortion. Here’s an example of that third point:

This Asbury Park letter design is an example of what I consider “lettering,” rather than “calligraphy.” It is drawn, rather than written, and will be extensively retouched and manipulated before I reach the final version. As a contrasting example of “calligraphy,” here’s a design based on something I discovered in my inspiration files last night:

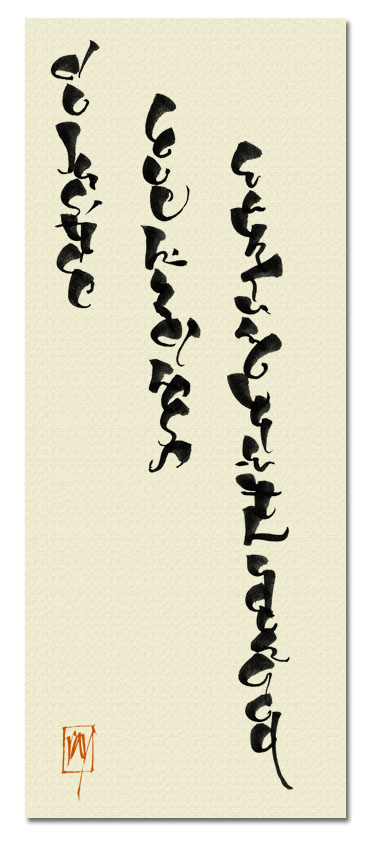
This lettering was written with a brush, and I was deliberately playing with the brush characteristics, trying to see if by exaggerating the thicks and thins, and stacking the letters, I could get something that resembled an oriental script. In this case, I haven’t manipulated the original letters at all – I just layered them over a textile background in Photoshop, and added a “chop” in a typical orange-red. The text, in case you can’t read it, is from Micah 6:8: “And what does the Lord require of you, but to do justice, to love kindness, and to walk humbly with your God?”

Next, I’ll try to show an example of using the Asbury Park lettering with a photo.