Timeless mementos

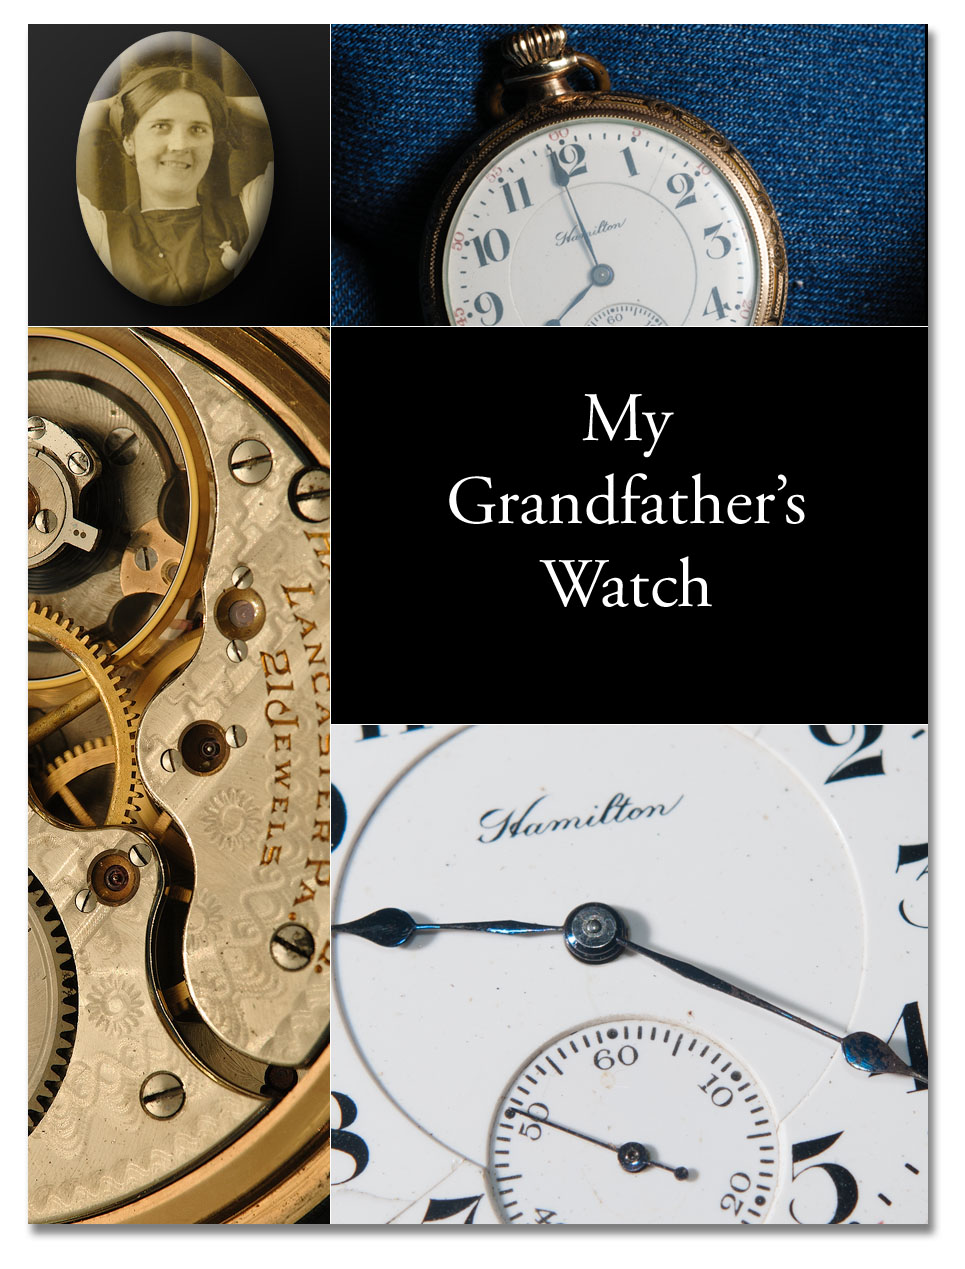
I recently inherited a pocketwatch. It’s a Hamilton Model 992 “railroad” watch, so-called because this model became one of the standard accessories of the railroad conductor in the US at the turn of the 20th century. This watch had been sitting on the dresser in my parents’ bedroom, mounted on a brass stand, for a number of years. I assumed the stand was something my mother had found for my dad, and that this was probably his father’s watch. When I first brought it home and wound it, it seemed to run fine, but I had no idea about how to set it, or even open the case. After a bit of web research, I learned that the case was a screw-on style, and that the watch could be set by opening the “crystal” (which is really a form of plastic) and pulling out a setting lever, which would then allow the hands to be set with the stem. I also saw photos on the web that showed that the watch serial number would appear on the works, beneath the back case. When I unscrewed the back, I was surprised by a tattered piece of paper falling to the floor. Picking it up and turning it over, I found a photograph, not of my father’s mother, but my mother’s mother. So now it appears this watch was owned by my Granddad Bourne, not Granddad Ritchie.

All the photos I had ever seen of Grandma Bourne in her young days were serious, unsmiling portraits, usually in a family group. This one, in contrast, is almost a glamor shot, with Grandma posed pulling up her hair behind her head, smiling – my guess is that it may have been a special memento she had made especially for Granddaddy, perhaps some time around World War I, when he was stationed at Camp Zachary Taylor, in Louisville, Kentucky. The camp was opened in 1917, and closed in 1920. Other than my grandfather, one luminary of note stationed there was F. Scott Fitzgerald.

From the serial number inside the case, I learned (from tables of serial numbers on several watch collector websites) that this watch was manufactured in Lancaster, Pennsylvania around 1905. Since Granddaddy would have been only 12 years old that year, it seems likely that the watch may have originally belonged to someone else – maybe his father.

The photo of Grandma in the montage above has been heavily retouched – the original had many cracks, scratches, and stains. I’ll try to do another post showing the “before” and “after” of that restoration. I don’t think the watch is especially valuable, but it’s at least a nice curiosity, since it works and was one of the earliest copies of this model. The 992 was apparently introduced in 1903, and I believe only about 8000 had been made by 1905; however, several hundred thousand copies were eventually manufactured, so it’s not a rare specimen. This particular watch has cracks in the porcelain face, which reduces its value to collectors. Still, to me it carries timeless, invaluable memories. It is now sitting on my dresser, keeping time to within about 30 seconds a day, and I think of my grandparents each day as I wind it.

10 years of Digital – part 1

A lot of us do a bit of looking back in January of each year, and as I was doing my own reflections this year, it occurred to me that it had now been more than 10 years since I started moving from film photography to digital. I received my first digital camera, a Canon G1, as a gift in June of 2001. This was, I think, one of the first digital compact cameras aimed at the “enthusiast” market – that is, the target market was “serious” amateur photographers, rather than family point-and-click shooters. In any case, I quickly grew to love it, and especially the digital shooting experience of being able to shoot as much as I liked with essentially zero added cost, and being able to instantly review my result and shoot again if I wasn’t happy. Even though the G1 was only a 3 megapixel camera (absolutely puny by today’s standards), it made great-looking 4×6 prints, pretty good 5×7′s, and I found that with careful attention to technique, I was occasionally able to print as large as 8×10. The whole experience of being able to shoot, instantly review, re-shoot if necessary, and then print “large” on my own printer had me hooked on digital for good.

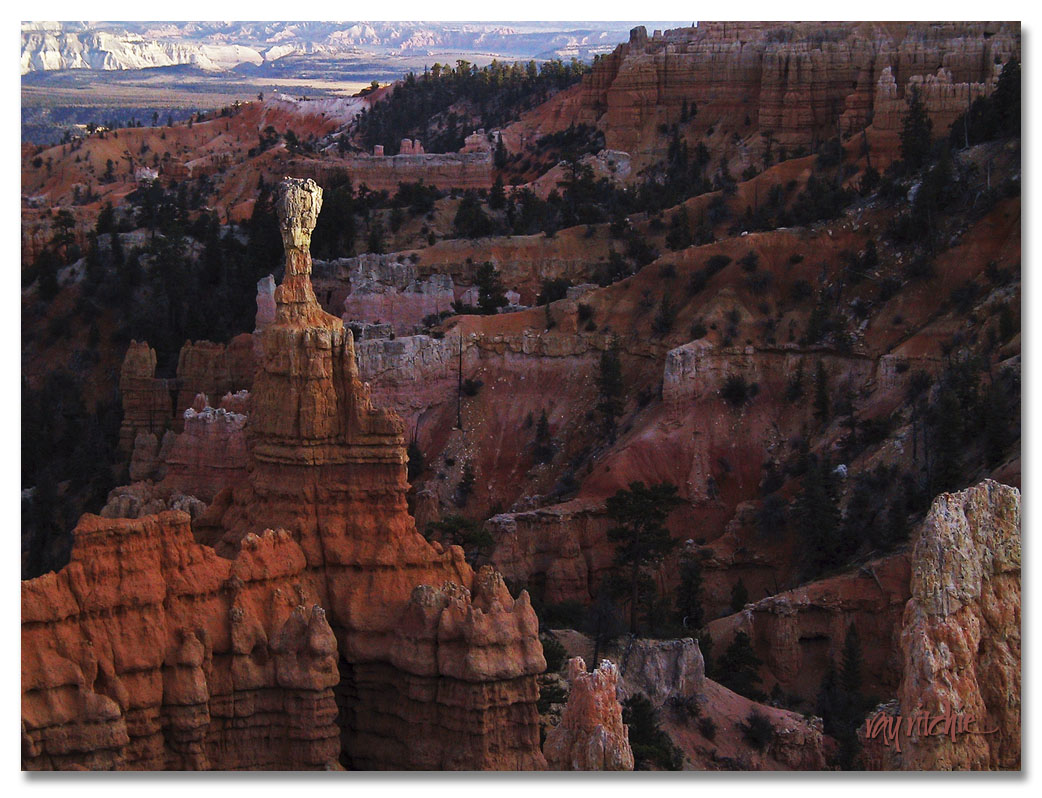
In fall of that year, Anita and I made a trip to Zion, Bryce and Grand Canyon National Parks, and the G1 got a good workout, as we found photo ops at every turn. It seemed to me at the time that I was shooting constantly, but when I recently went back and reviewed my photo files, I found that I probably shot less than a tenth of the number of shots I would shoot on a similar trip today. I guess I may have still been shooting with a film mentality, subconsciously imagining how many “rolls” I had shot and calculating the cost of development. Many of the shots that I was impressed with then no longer thrill me, but there are still some that I really like. Here’s one of my favorites, a shot of Thor’s Hammer at Bryce Canyon (click on the image for a larger view):

I love the way that Thor’s hammer just catches the light of the setting sun in this shot.

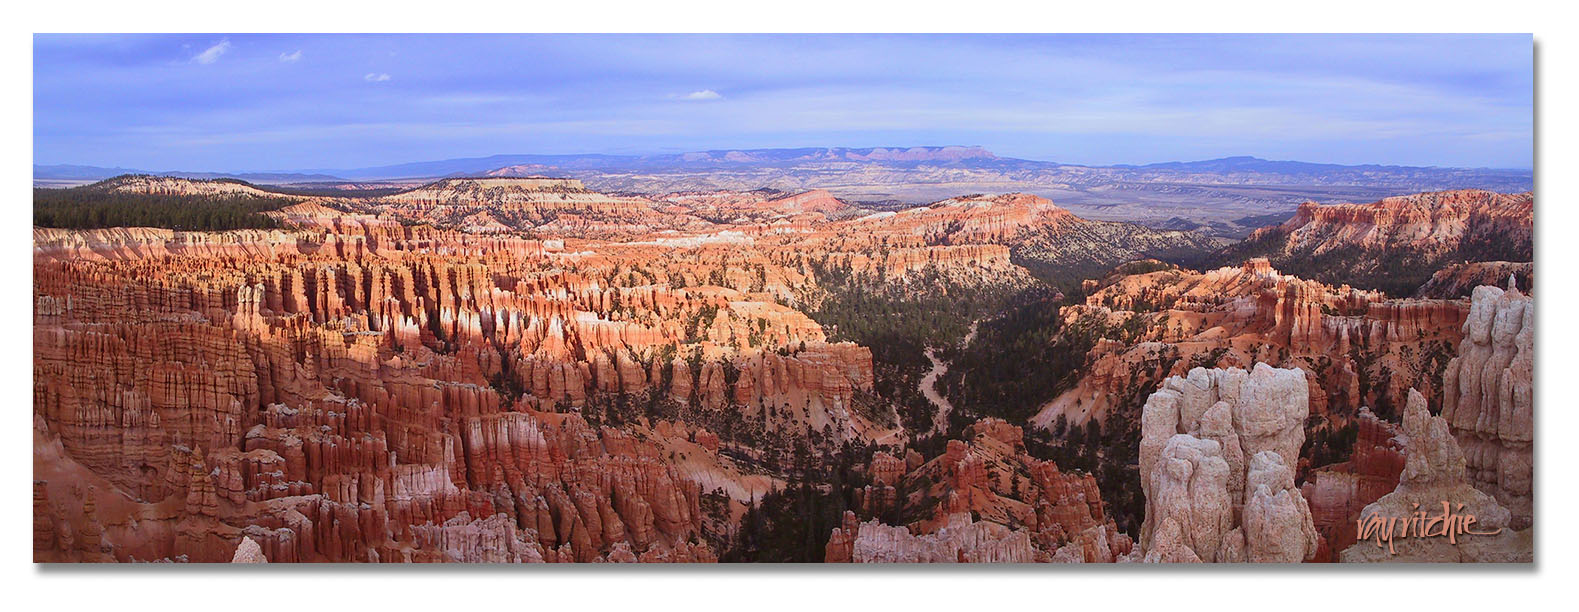
Here’s a second example, which was my first-ever digital panorama, stitched together in Photoshop from multiple shots:

Looking at the photo, I can’t help thinking of the words supposedly uttered by the white settler who “discovered” Bryce: “That’s a helluva place to lose a cow.” As usual, clicking on the image above will take you to a larger version, which I highly recommend in this case (the best way to do this would be to right-click and choose “Open Image in New Window,” and then expand the image to full size by clicking with the “+” sign).

Our trip to Bryce is one of my all-time favorite travel memories. We arrived late-afternoon, in early November, and found we had the park almost to ourselves. There were only a few other tourists at the visitor center, and as we began driving around the perimeter of the canyon, we found that at many of the overlooks, there were no other cars in the parking lot. As we went down into the canyon for a hike on the Queen’s Garden trail the next day, I think we met only one other party. We were actually very lucky with the weather, too – as we left Bryce on the morning of our third day there, we had snow flurries, and a gathering storm chased us all the way down the mountain and through the Grand Staircase National Monument on our way to the Grand Canyon. I remember, too, that our route through Grand Staircase had been picked for us on a TripTick from the AAA. It turned out to be a gravel road something like 26 miles long, and included such thrills as a fording of a stream in our rental car, and maneuvering around fallen bolders which were partially blocking the road. In the entire 26 miles, I think we saw only one or two trucks of hunters, and with the storm clouds behind us, we were very nervous about whether we’d make it back to the paved highway before we got stranded by a flash flood or a flat tire. I regret now that we didn’t allow ourselves any photo stops during that segment, but it’s hard to describe how threatened we felt on that road in our rental Ford Taurus, not knowing what lay ahead or how long it would be before we could get help if something happened.

Apache Wedding Blessing

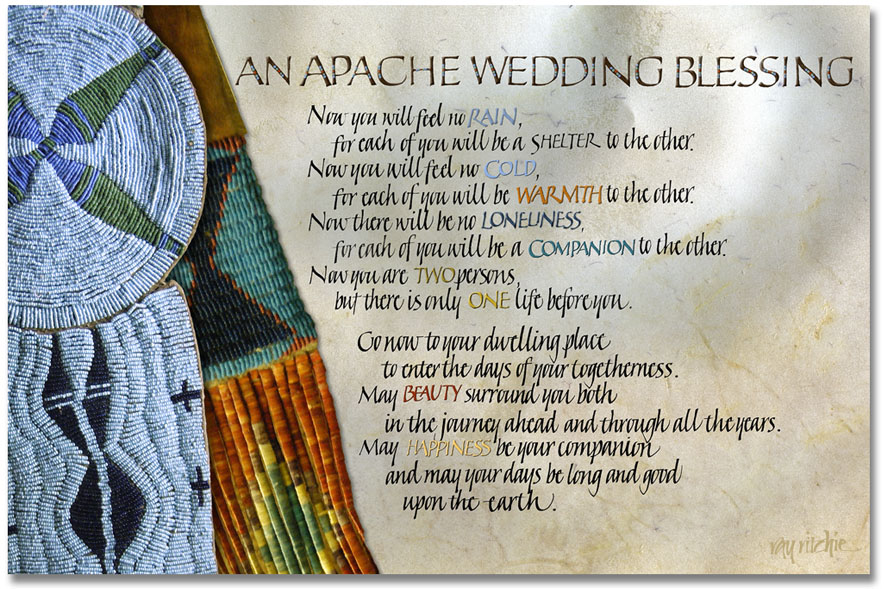
I feel like I should be doing a “Happy New Year” post today, but I don’t have any material on hand for that at the moment. What I do have is a piece that I’ve been wanting to share for about a month. I was waiting, though, until after we had given a framed version to our son and daughter-in-law. We finally got to share a belated Christmas with them, and so now I’ll share it here.

Apache Wedding Blessing

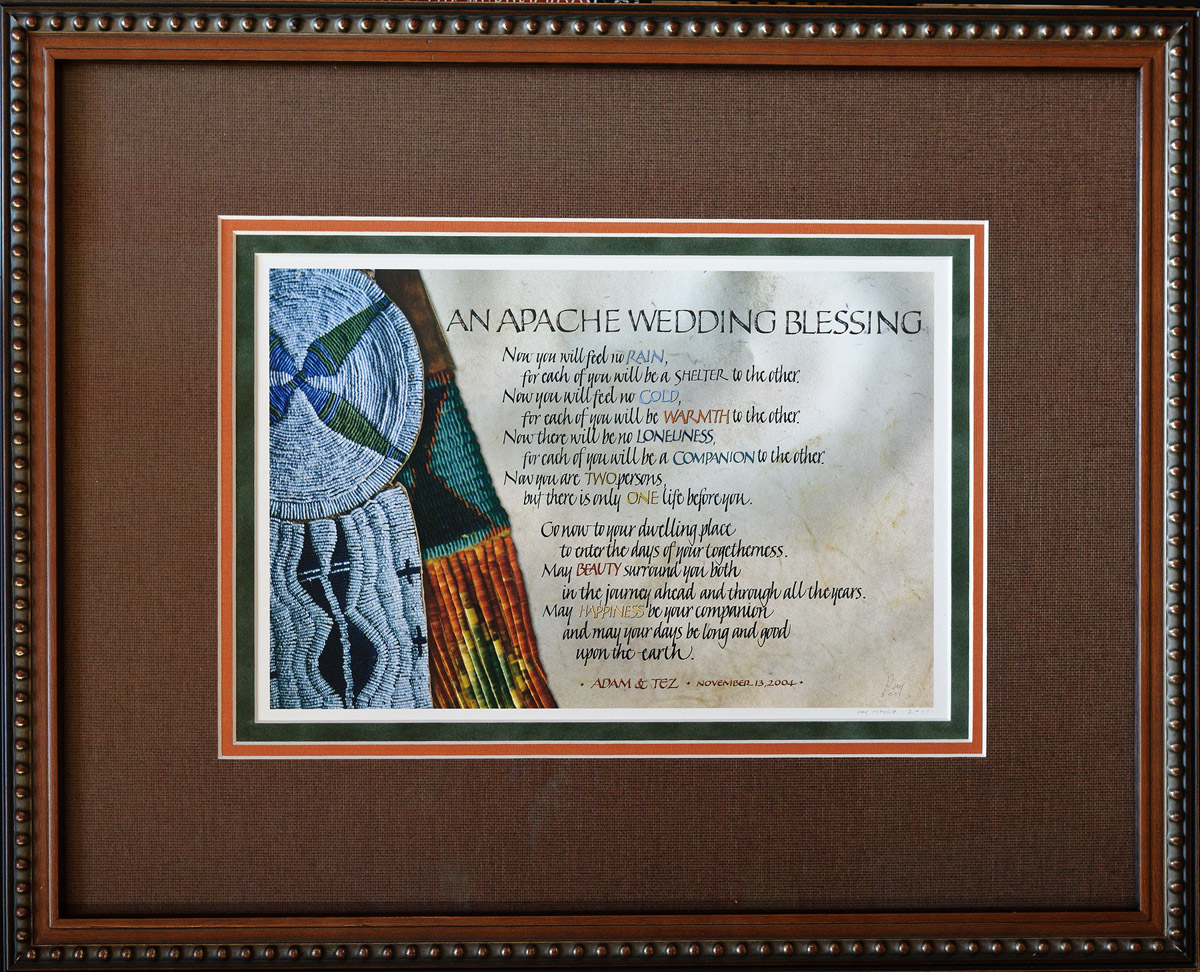
This blessing was used at our son and daughter-in-law’s wedding seven years ago, and they had asked me to do a version of it “when I got around to it,” so we see once again the hazards of not giving me a deadline. The text is very popular, but is usually not attributed, and in the piece above I have also omitted an attribution for now. From my Internet research, I’ve learned that it probably is not an authentic Apache blessing, but may have been created around 1947 for the novel Blood Brother by the author Elliott Arnold. That novel was later made into a very popular movie, Broken Arrow, starring James Stewart. I understand that versions of the blessing may appear in both the novel and the movie, but at this point, I haven’t had the time to research that. I hope to chase it down in the next month or two, so that I can ask for copyright permission to use the text, if that turns out to be necessary. Both the novel and the movie have received praise for their treatment of Apache culture, so hopefully the blessing is at least in keeping with the spirit of its supposed source.

The artwork here, as in many pieces posted on this blog, is a Photoshop composite from photographs. I found the two beaded pieces on display in 2003 in the David T. Vernon collection of American Indian Arts, which is normally exhibited at the Colter Bay Visitor Center in Grand Teton National Park. I understand, though, that the entire collection is now undergoing conservation and restoration treatment, and may not return to public display until funds can be raised for a suitable new museum to be constructed. I had made a separate photo of each of the pieces, and overlaid one on the other in Photoshop. Prior to this piece, the photos have just been sitting in my files, unused, for 8 1/2 years – a good argument for the “don’t throw anything away” school of digital photography. The rest of the background is a scan of a piece of calfskin vellum.

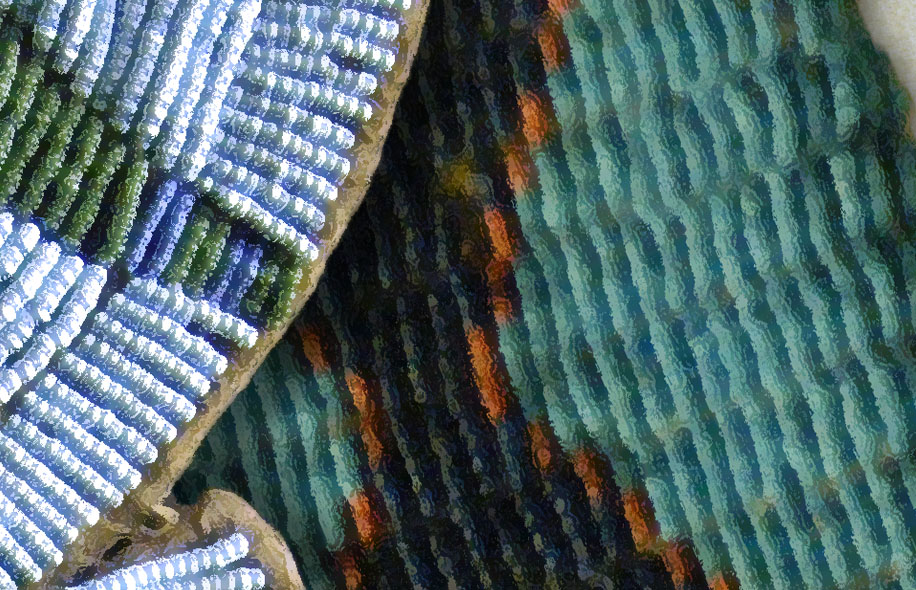
As I often do when I combine photos and calligraphy, I turned the beadwork photos into more of a painted effect, this time by using Photoshop’s Dry Brush filter. Here’s a close-up of the result of that filtering:

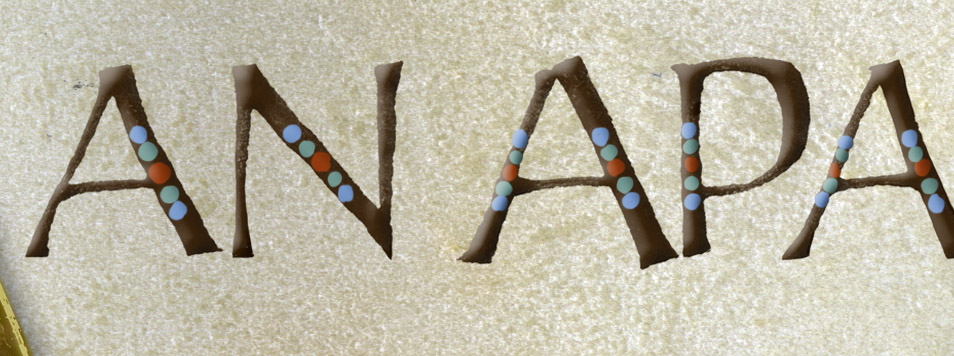
Part of my reason for using the filter in this case was that the original photos had been taken in relatively dim light, with no flash or tripod, in the museum, and so they were not particularly sharp or contrasty. The Dry Brush filter exaggerates the contrast and color saturation, and converts somewhat blurry edges into sharper features. When I did the headline lettering for the text, I decided to continue the beadwork motif, and decorated the caps with dots of color sampled from the beadwork photos:

The style of the Italic calligraphy was deliberately left a little rough, as I felt that was more in keeping with the artwork, background, and the supposed Apache roots of the text than a more polished style would have been. I may play a little more with that in the future.

Here’s a photo of the piece after personalizing it for Adam and Tez and having it matted and framed:

Angelic Details

I thought I’d share some of the details behind the design of the 2011 Christmas card, as I know there are at least a few readers who care about such things, and I usually enjoy sharing nerdy details, myself.

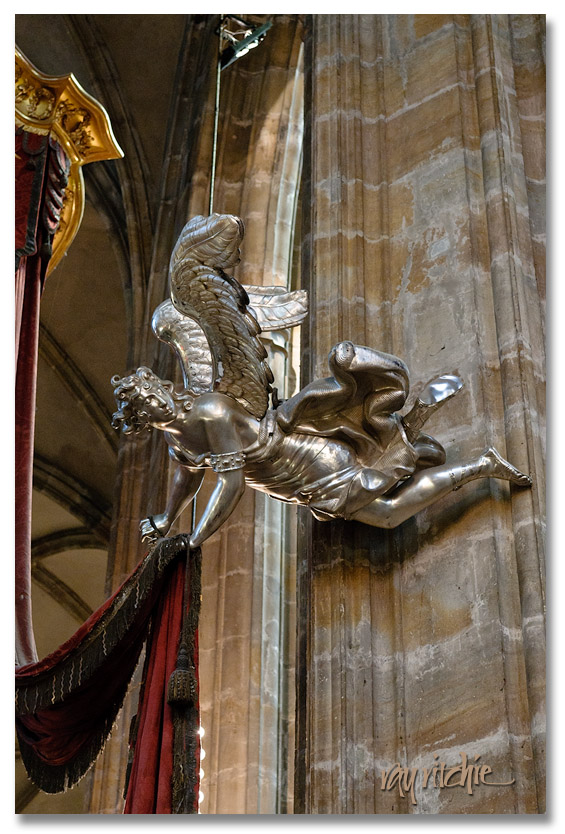
As I mentioned in the previous post, I usually start my designs from the text, as for the majority of cases, the text contains much of the message, and I’m usually trying to support that message with the artwork. In this case, for example, the text brought in the idea of angels, and I then remembered that I did have a nice angel photo in my personal stock library. Here’s the angel I used for the 2011 card, as I found her hanging in St. Vitus Cathedral in Prague:

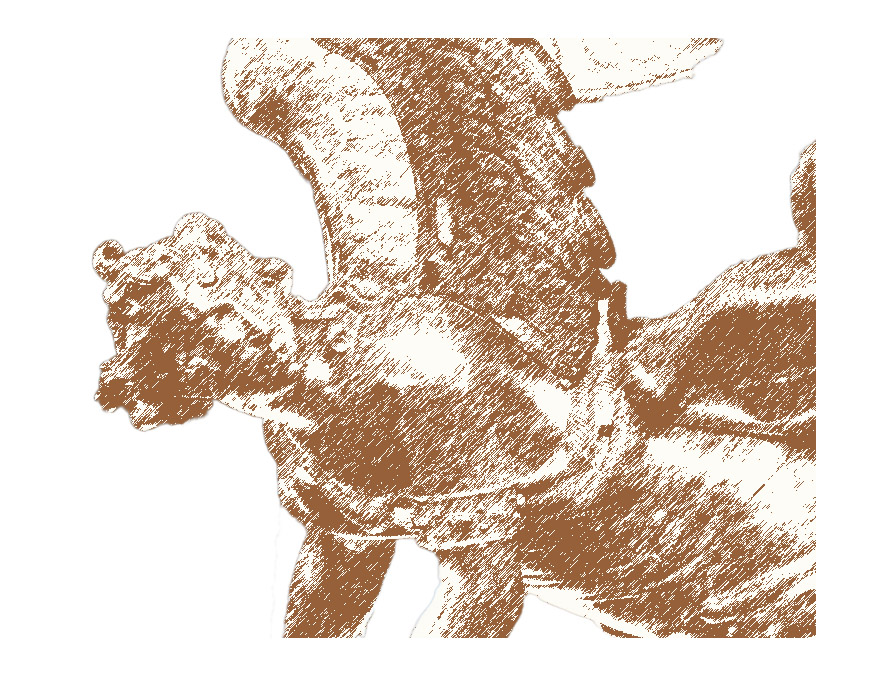
The first step was to extract the angel from her surroundings, as I wanted to use the angel alone, without the rest of the cathedral There are lots of ways to do this, but what I did was to duplicate the photo to a second layer, then use Photoshop’s Quick Select tool by clicking and dragging across the angel, and finally, I created a layer mask.  I then used the Refine Mask command to paint in (or out) those parts of the edges that were incorrectly selected. This extraction process probably took 15 or 20 minutes of work to get just what I wanted. After I was satisfied with my selection of the angel, I moved on to the problem of altering her appearance. The photo itself is pretty sharp and detailed, which is highly desirable from a photographic point of view. For my card designs, though, I’m often trying for more of a “painterly” effect, so I wanted change the photo to something that looked more like a drawing. I’ve talked about how to do that before, but for now, I’ll just say that I used Photoshop’s filters to do the job. Specifically, I used Filter>Sketch>Graphic Pen, which then gave me an angel that looked like this:

I wanted to set the angel against a night sky, partly because of the “angels’ footsteps passing in the night” phrase in my text, but also because I usually think of night when I think of Christmas. Christmas Eve services have always been a favorite part of the Christmas experience for me, and a night sky and a “star of Bethlehem” often find their way into my cards, as they did this year. I started by creating an inky blue background layer, and then laid my extracted angel on top of that. The colors in the angel sketch above were now wrong, so I started by inverting the colors to give light on dark instead of vice-versa, and then I added a color overlay to make the angel drawing more compatible with the blue of the background. I also wanted to take advantage of the fact that the angel is looking over her shoulder. I noticed that the strongest light in the cathedral in the original photo was coming from the upper right, which happens to be more or less the same direction she’s looking (a happy coincidence), so I decided that she would be looking towards a “heavenly light” coming from the upper right corner of the card. I created that light by adding a radial gradient fill above my background layer. As I further critiqued my work, I decided the plain blue background was too sterile and artificial-looking, so I decided to add some clouds (Filter>Render>Clouds), and I also added some random stars here and there with the Pencil tool and my Wacom tablet (you can use a mouse – it’s just not as easy to draw with). At this point, my background art was nearing completion, and I just needed to do a little adjusting of the blending of the various components to make everything fit together.

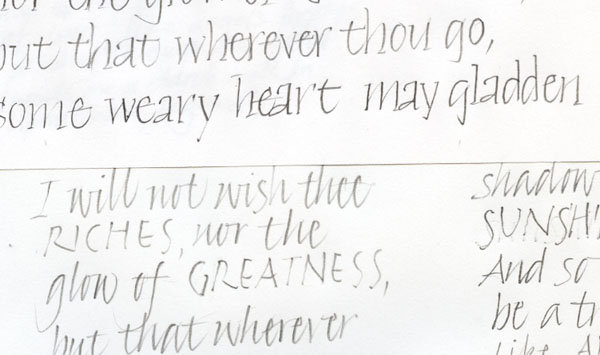
The final step was to add the calligraphy. I started with a couple of pencil sketches, just to give me a feeling for how the text would lay out in a couple of styles. Here’s a piece of my pencil drafts, just to give you an idea of how rough things were at this stage:

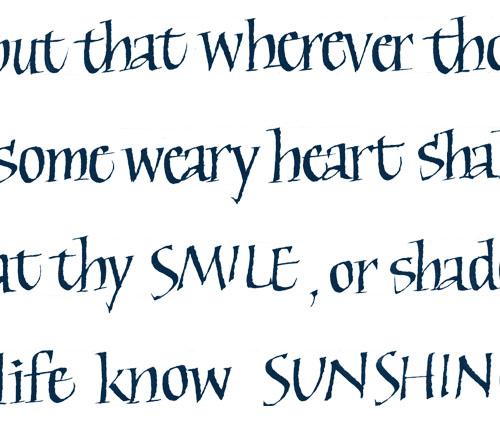
I originally imagined I might do the card text in a sort of modified bookhand (or “Foundational,” as Edward Johnston’s disciples called it). Here’s a detailed crop from the first draft of that idea:

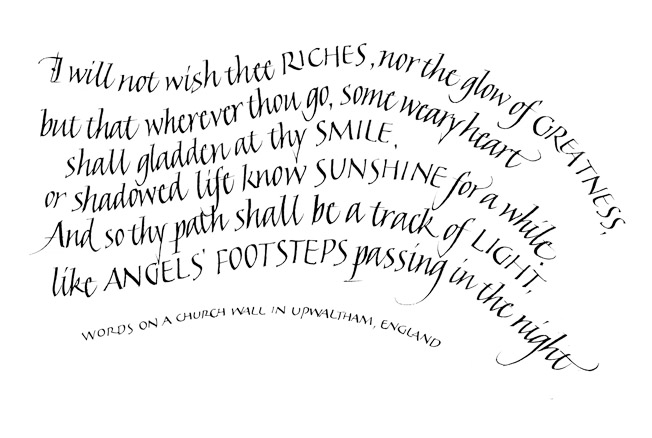
In my first paste-up of the entire card, I just put the text into a rectangular block. I was totally unhappy with the way this looked on the card, though, and immediately began playing with other approaches, finally settling on having the text follow curves which worked in to the curves of the angel’s pose. I made my first stab at that idea by using Photoshop’s Warp tool to add curves to my rectangular text block. Of course, just warping a block of text doesn’t give you very nice-looking letters, but it did give me a feeling for what the layout would look like, and I decided curved lines of text would work if I re-did the calligraphy; this time, because of the curved lines, I thought Italic would work better. You can see the final calligraphy fairly well on the photo of the full card (see post here), but here’s a slightly larger version of the text alone:

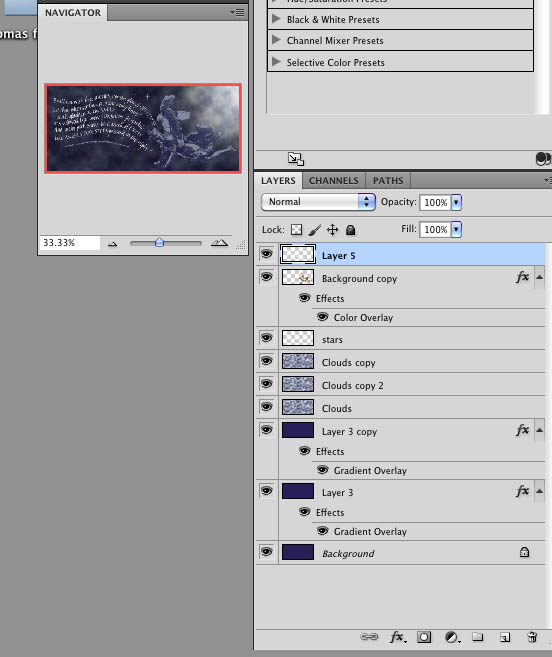
As always, I can still see lots of details that could be worked further, but at this point, I was happy enough with the card to print it and send it, and I was up against my deadlines for addressing and mailing, so for this year, the card was done. For those who are familiar with Photoshop, here’s what the overall design structure looked like once everything was assembled:

Each of those layers has a slightly different Blending Option, to change the strength of the effect and how the layer looks against the surrounding layers. Some of the duplicate layers were only added after making test prints, and deciding that some part of the design was printing too light or too dark.

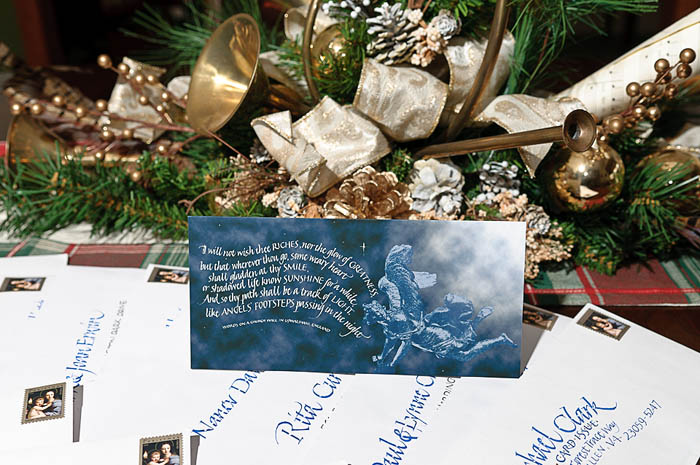
And here’s the final card, sitting on the dining room table on top of a pile of the addressed envelopes:


Smiles, Sunshine and Light

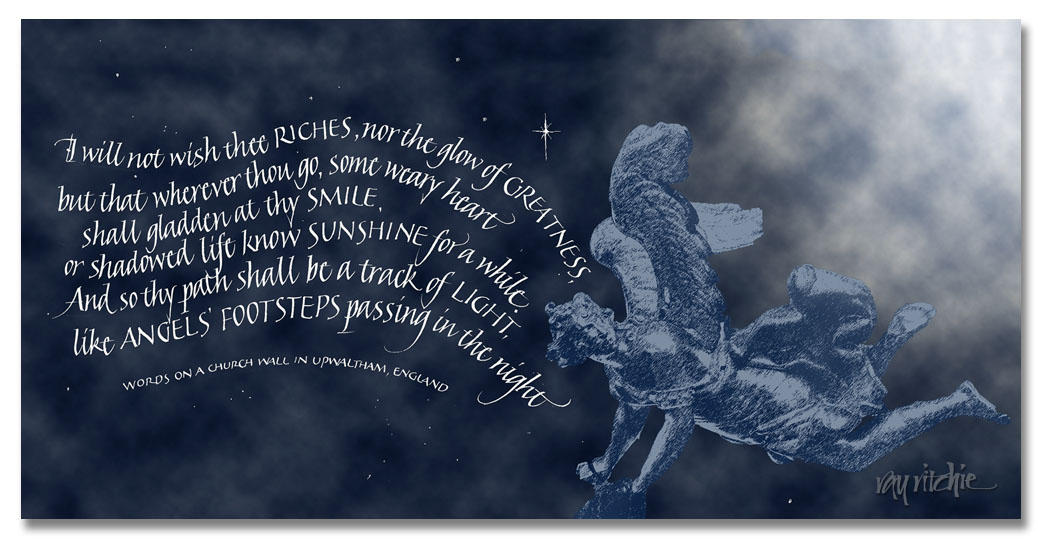
Almost all the Christmas cards finally got addressed and taken to the post office yesterday, so I’m ready to post our card online. I’ll share some of the background details of the design process later, but here’s the final result for this year:

Christmas, 2011

I’ve mentioned before that I’m always late in getting my annual Christmas card design done, and that I never get anything done without deadlines. One reason is that I’m always looking for just the right text to express what I’m feeling, or to go with other things that I want to share on the card. Because I was struggling with my feelings this year, I was having a hard time picking the text, until I found this little poem.

According to that highly reliable source, The Internet, these are “words on a church wall in Upwaltham, England,” though my attempts to track them down did not locate any Upwaltham source that acknowledges their existence there. But they still spoke to me, and as soon as I found them, I felt they were the words I needed this year. Anita put her finger on the reason as she wrote our Christmas newsletter to go with the card. She said that my mother had been a person who spread smiles, sunshine, and light all along her path in life, and I knew immediately that she was right.

So after finally finding a text last weekend, I felt ready to design the card, and it came together relatively quickly, at least relative to how such things usually go for me. The angel on the card (Mom loved angels) is from a photo I took at St. Vitus Cathedral, in Prague, during our visit there in 2009. She was a metal sculpture, hanging suspended in the air; unfortunately, I don’t know who the artist was. I’ll show the original photo in my follow-on post. I extracted her from her surroundings using various Photoshop tools, and turned her into more of a sketch appearance, which I often prefer when combining photography and calligraphy. I created the background night sky and “heavenly light” painting from scratch, and overlaid the photo and my scanned calligraphy, adjusting the blending of the layers to get the overall mood right, preserving the dark of the night sky while bringing out some of the detail of the misty clouds. I re-did the calligraphy a couple of times before I was satisfied with how the image and calligraphy worked together.

I still have a few more cards left to send to calligraphy colleagues. I have hundreds of “Internet friends” in calligraphy through Cyberscribes, as well as calligraphy friends I know much better through intensive workshops we’ve attended together. It’s not feasible to mail physical cards to all of them, of course, so I usually try to pick a dozen or so names not-quite-at-random to share a card by “real” mail. For the rest,sharing the card here and on the Cyberscribes graphics board will have to do. I hope  this greeting finds you all well, and that you, too, may find and spread smiles, sunshine, and light wherever your path may lead you in the coming year.

Please click on the image above, so that you can see the card closer to actual size.

It’s beginning to look a lot like Christmas…

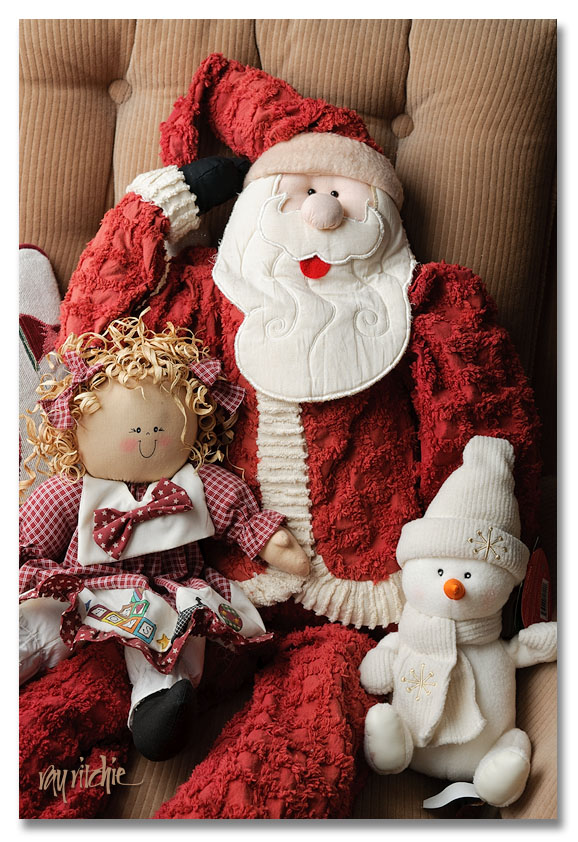
I had some trouble getting into the mood for Christmas this year, as with my mother’s death in April, many of the family traditions seem to have started slipping from our grasps. But Anita pushed me, and we did get the decorations out, the tree put up, the stockings and Moravian star hung, and all the holiday dishes put out, so it does actually look something like Christmas here now. We did our Christmas choir program last week, and repeated it for a local retirement home, and on Saturday we went to a holiday concert by the New Jersey Chamber Singers, so it’s starting to feel like Christmas, too. Last night and today I (belatedly) got our Christmas card designed and printed, something I missed doing last year due to Mom’s hospitalization. I like this year’s design, and am anxious to share it, but my tradition is that I don’t reveal the design online until at least a couple of days after the cards are mailed, so in lieu of that, for now I’ll share this photo:

These figures are frequent test subjects for me when I want to experiment with lighting techniques for portraits, as they have some of the dimensionality of a human face, and lots of fine textures that help me check my focus and processing (In the shot above, the lighting was done with a combination of natural window light and off-camera flash through a white umbrella). They’re also usually part of our holiday decoration scheme somewhere in the house; Santa and the snowman are currently sitting in the rocker in the living room.

I’ll be spending the next day or two addressing envelopes and getting the holiday newsletter printed, and then the cards should go in the mail Wednesday and Thursday – hey, the USPS still have almost 10 days to do their part! I’d never get anything done without deadlines.

In the meantime, consider this an early Christmas greeting from my family to yours.

Imagine

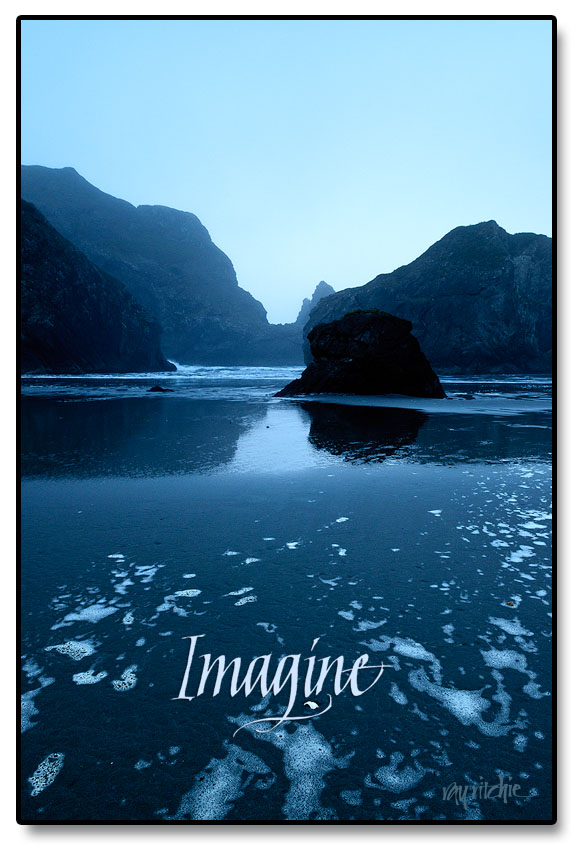
When we made our trip up the Oregon coast about a year ago, the single thing that left the most enduring image in my mind was the “seastacks.” These rocky outcroppings, unlike anything I’ve seen on the Atlantic coast of the U. S., are ancient remnants of a coastline that no longer exists; all of it except for these strange shapes has been eroded away over thousands, or even hundreds of thousands, of years. When we were staying overnight at Gold Beach, I got up very early and drove down to Meyers Creek Beach, in Pistol River State Park, to watch and photograph the seastacks in the early morning light. I was on the beach before first light, and as I walked along the wet sand dodging the incoming tide, the looming rocks were almost spooky, causing my imagination to work overtime.

Here’s one of the images from that shoot, in poster form:

Seeing that piece of shell in the foreground, I couldn’t resist giving it a little emphasis with the calligraphic flourish on the “g.” What lies beyond the rocks is left to your imagination.

Letters and Spirit

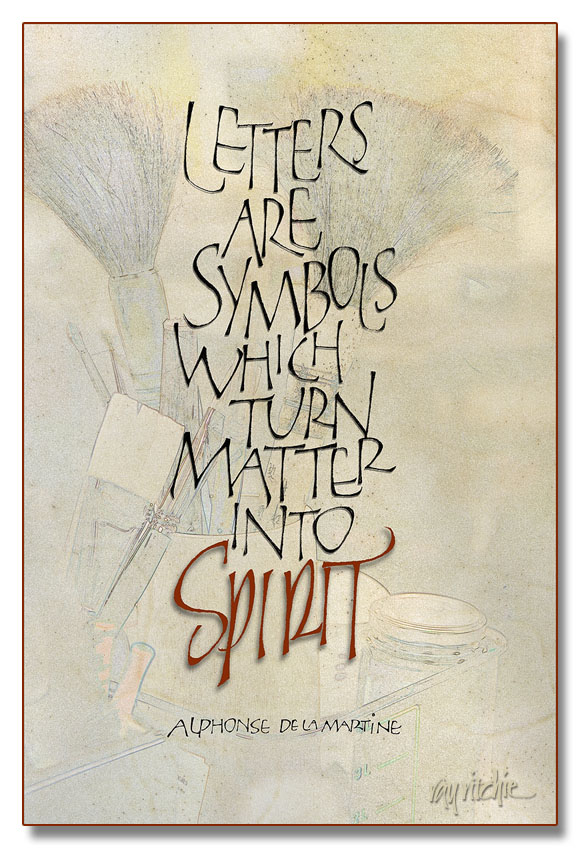
I’ve been in a production mode this week, as I’m going to a small local craft show at our church, and have been feeling that I didn’t have enough new things to show. I’m really terrible at guessing what will sell at these things, so I seem to wander in a lot of directions in my attempts to be “commercial.” The piece below probably isn’t going to be that successful for the current venue, but it’s a favorite quote for calligraphers, and I had never done it before, so once it came into my mind, I felt compelled to do it.

The letterforms of the main text should be familiar to you if you’re a follower of this blog, as they’re yet another variation of my loose modern caps, similar to those in my Beer Geek poster. I chose these forms because I feel they’re “mine” now, and different from most of the more formal treatments of this quote that I’ve seen. All the words were originally done in pencil, and then touched up on the Wacom tablet, after scanning them into Photoshop. The word “Spirit,” however, derives more from my pen and brush lettering than from the loose versal forms. The background started as a photograph, one of thousands I’ve taken over the years during various calligraphy workshops. It was turned into a sort of a sketch by a technique similar to that described in a previous post which you can see here. I then blended the photo with a scan of a very nice piece of calfskin vellum which has been sitting in my supply stores for over a year now, waiting for a project which justifies such an expensive material. I was glad I had it on hand, though, as I really love the look of the veins and the hair follicles for a piece so oriented towards calligraphy. And working in Photoshop like I was doing here, I was able to use it at no cost, as the vellum is still completely untouched. All of the letters have a small touch of shadow, to give a 3-D effect, but I deliberately gave a little more shadow to “Spirit,” to give it a sense of floating above the rest of the piece.

We’ll see whether it sells – if not, it won’t be the first time that something I have liked myself didn’t appeal to the public.

Explore

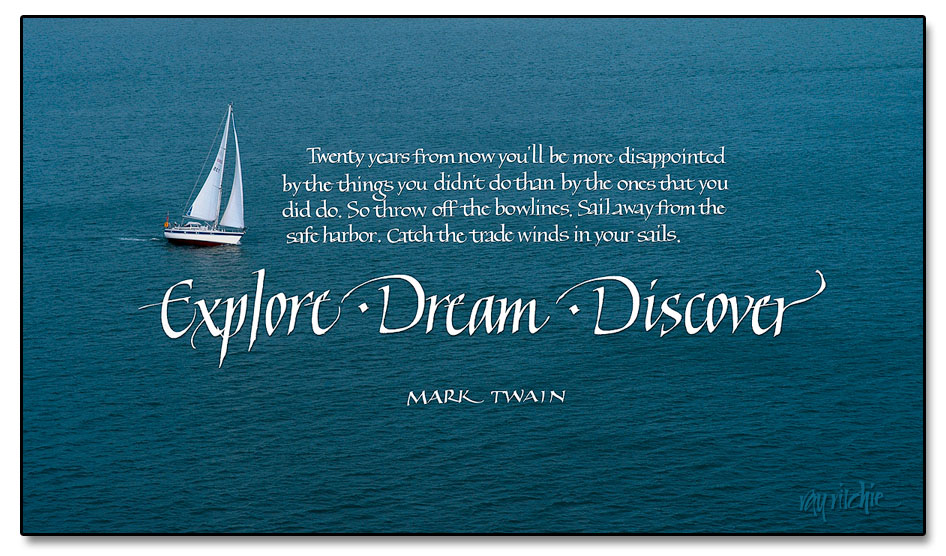
I originally created this piece about a year ago, but the quotation was set in type rather than hand calligraphy, and that never made me quite happy. Today I re-worked it with a calligraphic treatment, and I think I’m much happier with it now. This is one of those quotes that I saw somewhere, wrote down in my notebook, and never really questioned the attribution. I hope Mark Twain really said it; some Internet sources seem to cast doubt on that. I like it, anyway.

The photo was taken several years back when we were on a cruise around the British Isles  - I believe we were pulling out of Southampton harbor at the time. As usual, you can click on the image above to see a larger version.

Note for those sharp-eyed readers who may have seen the original version of this post: Yes, I did make a couple of changes. I decided that my two “D’s” in “Dream” and “Discover” were too different in shape, so I replaced one of them by a copy of the other. And after looking at the image awhile longer, I decided the word “Explore” was a little too compressed compared to the other two title words, so I did a small amount of manual kerning by sliding the letters around in Photoshop. Ah…all better now. (If you’d like to compare the two, the original can still be seen in the comments log at http://www.rritchie.com/wordpress/?attachment_id=788#comments)

Pseudo Kanji

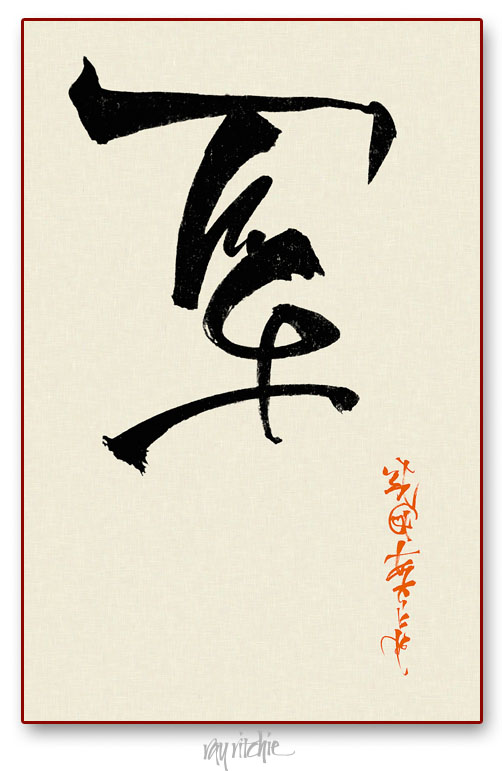
I have been interested in many aspects of Asian culture, and in particular, Japanese culture, for a long time. During my career in engineering, I had a lot of business dealings with Japanese companies, and had the opportunity to travel to Japan several times. Over the years, I picked up an interest in the board game of Go, and tried to teach myself some of the language. To me, the hardest aspect of the language was the writing system. Japanese uses several different alphabets, including Kanji (a set of pictograms for words derived from Chinese), Hiragana (a phonetic alphabet used for words of purely Japanese origin), Katakana (a phonetic alphabet for words of foreign origin), and occasionally, Romaji (Western Roman characters). Writing and reading Kanji, Hiragana, and Katakana are difficult because western eyes are not tuned to recognizing differences between characters, and because brush writing is a skill in itself. I do a lot of western brush calligraphy, and I do sometimes try writing certain common words in Kanji, but recently I was playing around with my brush, and decided just to create some marks that resembled Kanji, without concern for meaning. Here’s an example:

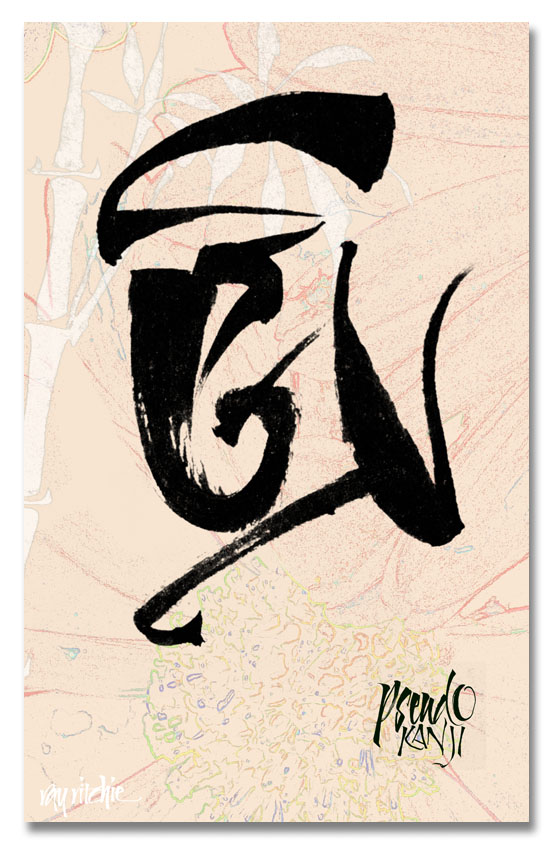
Here’s a second example, which I really did more as an exercise in creating a background texture than for the writing itself:

As far as I know, the above marks don’t actually say anything – they’re just interesting doodles. But when I do this kind of doodling, I feel like the Pogo character of Barnstable Bear, who could write, but couldn’t read, and had to have others to read it back to him before he knew what he had written. So if I have written something that offends you here, please let me know!